
In the previous section we have done Table level export import now we will do the schema level import export .
We will use the directory which we have already created in table level export section. Please visit the below link for Table level export import:
and follow the steps 2,3,4 if you are have not created any directory else you can use your created directory.
Once the directory created please follow the below steps to export schemas:
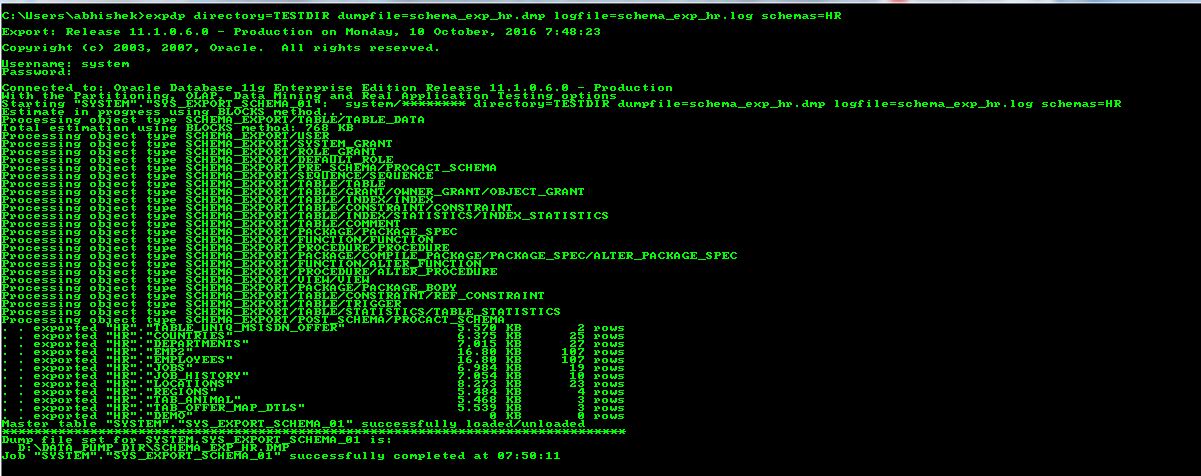
Step 1:- Export HR Schema
expdp directory=TESTDIR dumpfile=schema_exp_hr.dmp logfile=schema_exp_hr.log schemas=HR

Step 2:-Once export done please check the log schema_exp_hr.log
Step 3:- Now drop the HR schema along with all the objects inside it
Drop user hr cascade;
Step 4:- Import the HR schema again
impdp directory=TESTDIR dumpfile=schema_exp_hr.dmp logfile=schema_imp_hr.log schemas=HR

We will use the directory which we have already created in table level export section. Please visit the below link for Table level export import:
and follow the steps 2,3,4 if you are have not created any directory else you can use your created directory.
Once the directory created please follow the below steps to export schemas:
Step 1:- Export HR Schema
expdp directory=TESTDIR dumpfile=schema_exp_hr.dmp logfile=schema_exp_hr.log schemas=HR
Step 2:-Once export done please check the log schema_exp_hr.log
Step 3:- Now drop the HR schema along with all the objects inside it
Drop user hr cascade;
Step 4:- Import the HR schema again
impdp directory=TESTDIR dumpfile=schema_exp_hr.dmp logfile=schema_imp_hr.log schemas=HR

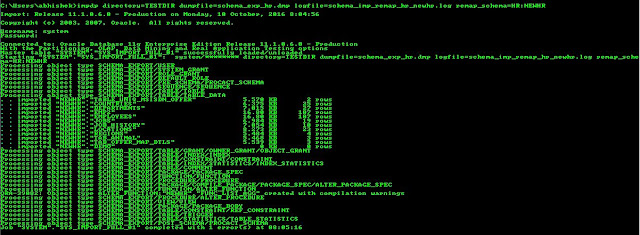
Step 5:- Once imported please check the log file :schema_imp_hr.log
and then try to log in with the HR log in credential .
REMAP_SCHEMA command will add objects from source schema to target schema
For Expample :The hr schema into the existing HRNEW schema.
if user HRNEW already exists before the import, then the Import will import all the object
else it will create HRNEW schema and then import all the object .
impdp directory=TESTDIR dumpfile=schema_exp_hr.dmp logfile=schema_imp_remap_hr_newhr.log remap_schema=HR:NEWHR

Related Article :


